
DIY Shipping Counter
I’m so very excited to share one of our latest builds for the loft and online shop. In order to have a designated product/ shipping area, I knew we were going to need some specific items that would serve as amazing storage and organizing, all while working around our tricky A-frame walls.
With that, our DIY shipping counter was born. I hope it works as well as my vision. 🙂

None the less, this is one huge counter. At 16′ long, this guy will provide an amazing amount of storage, as well as plenty of space to ship product.
Here’s how we made it:
First, I chose the overall measurement, 16 ft long x 3 ft wide x 36″ tall. With our lumber, we started by making the frame for the top…

We used screws to attach all the boards…

Then evenly spaced our middle support pieces throughout the table top…

For the support beams, because we needed to leave room for our table top to drop into the frame, we used our table saw to cut off the thickness of our top. This left us with the perfect gap to have the top sit smoothly…

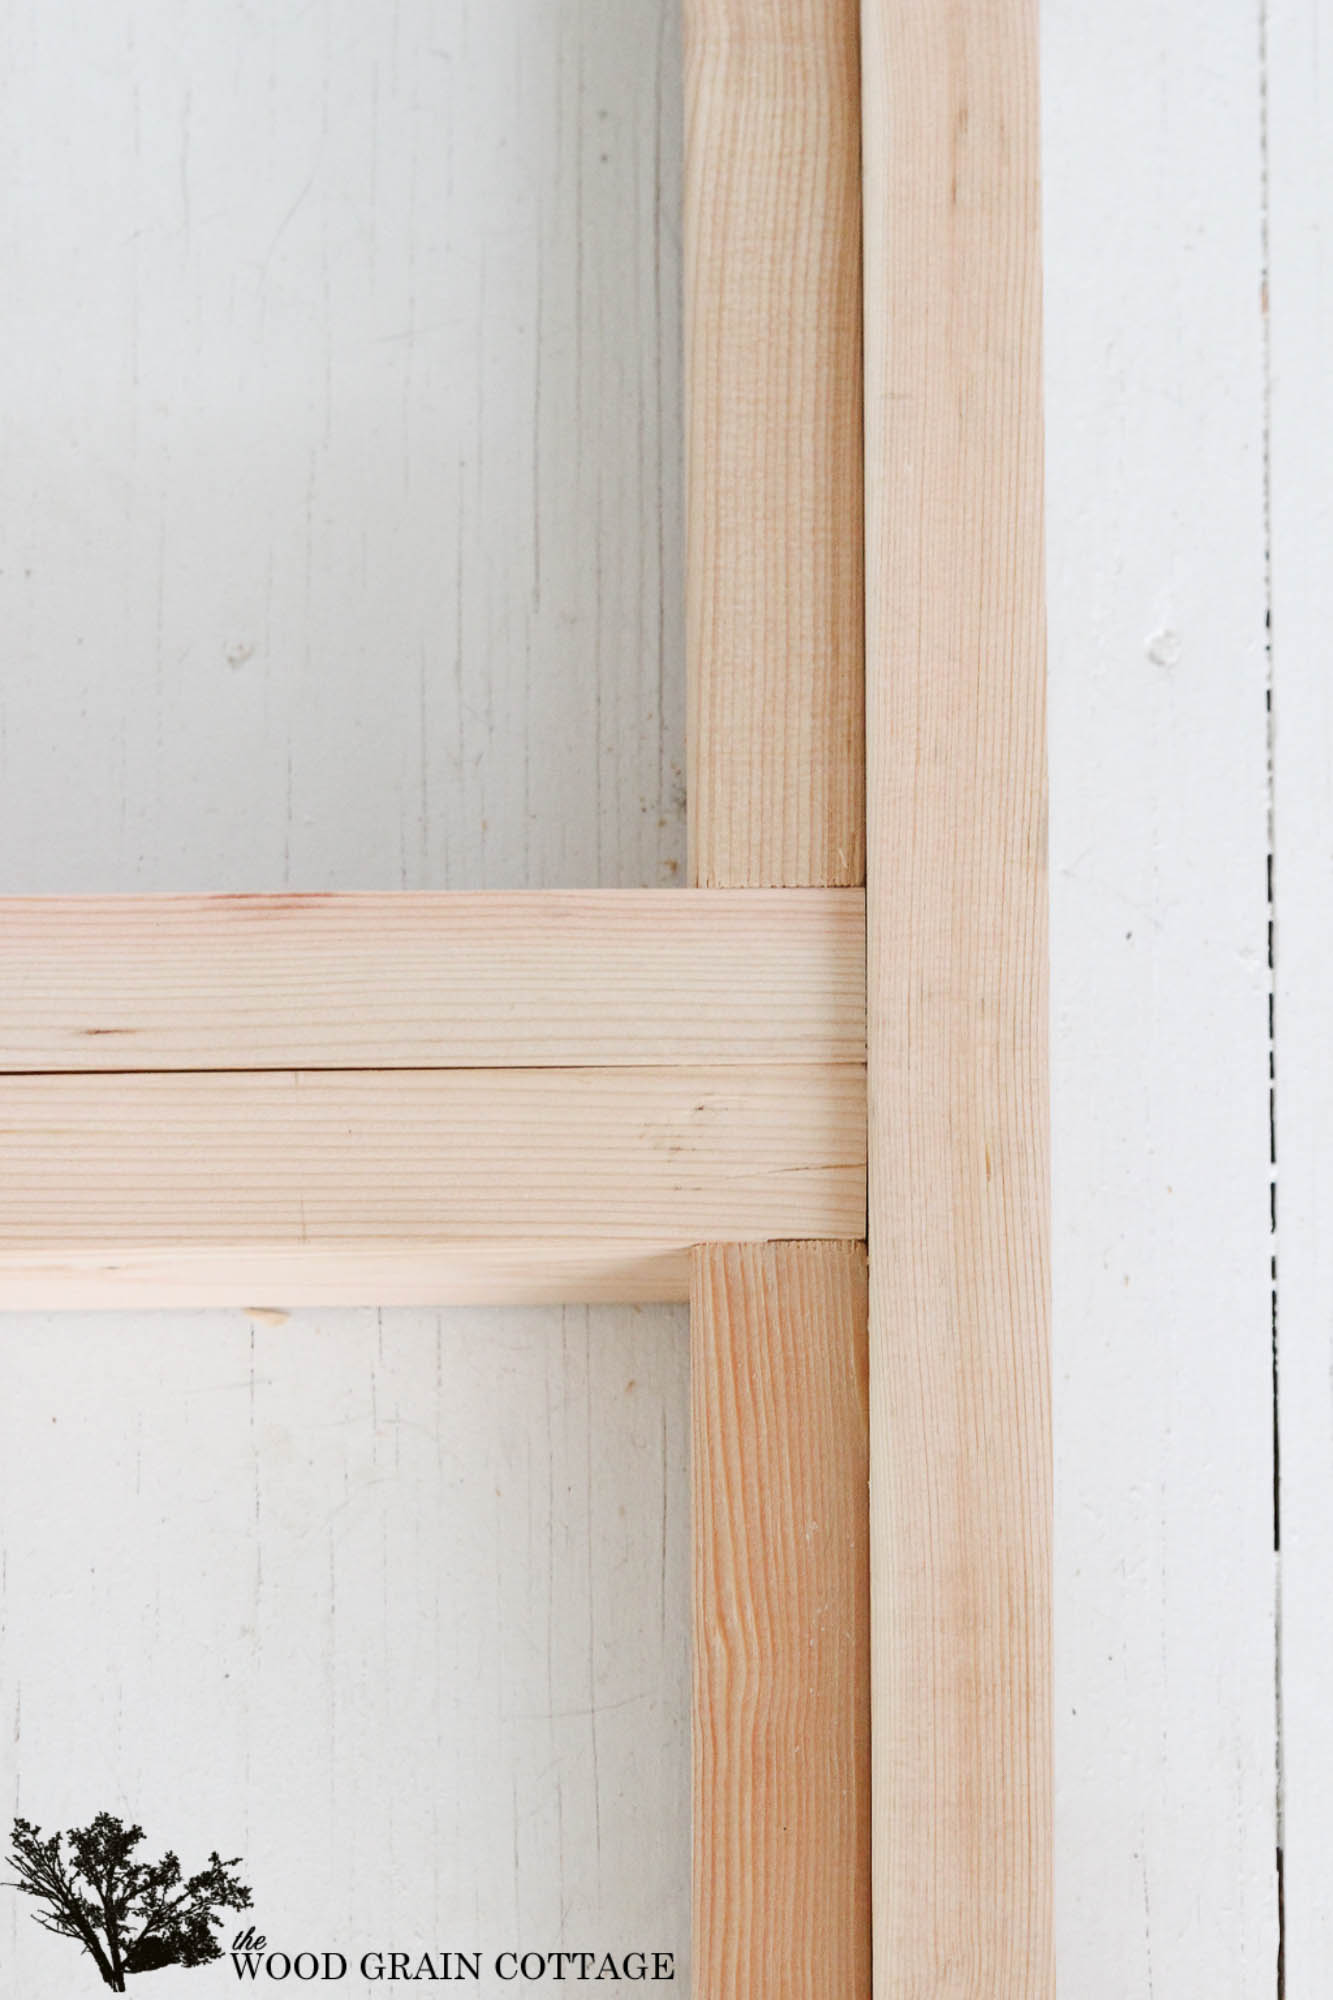
Then, to give the top even more support, we added boards on the sides…

We used clamps to hold them, then screwed them in place…

We added them to every space, except the two ends, which we added later. Here’s what it looked like…

And because we knew we would probably need to have a leg in the middle of the table to make it steady, we doubled up the middle section of the table…
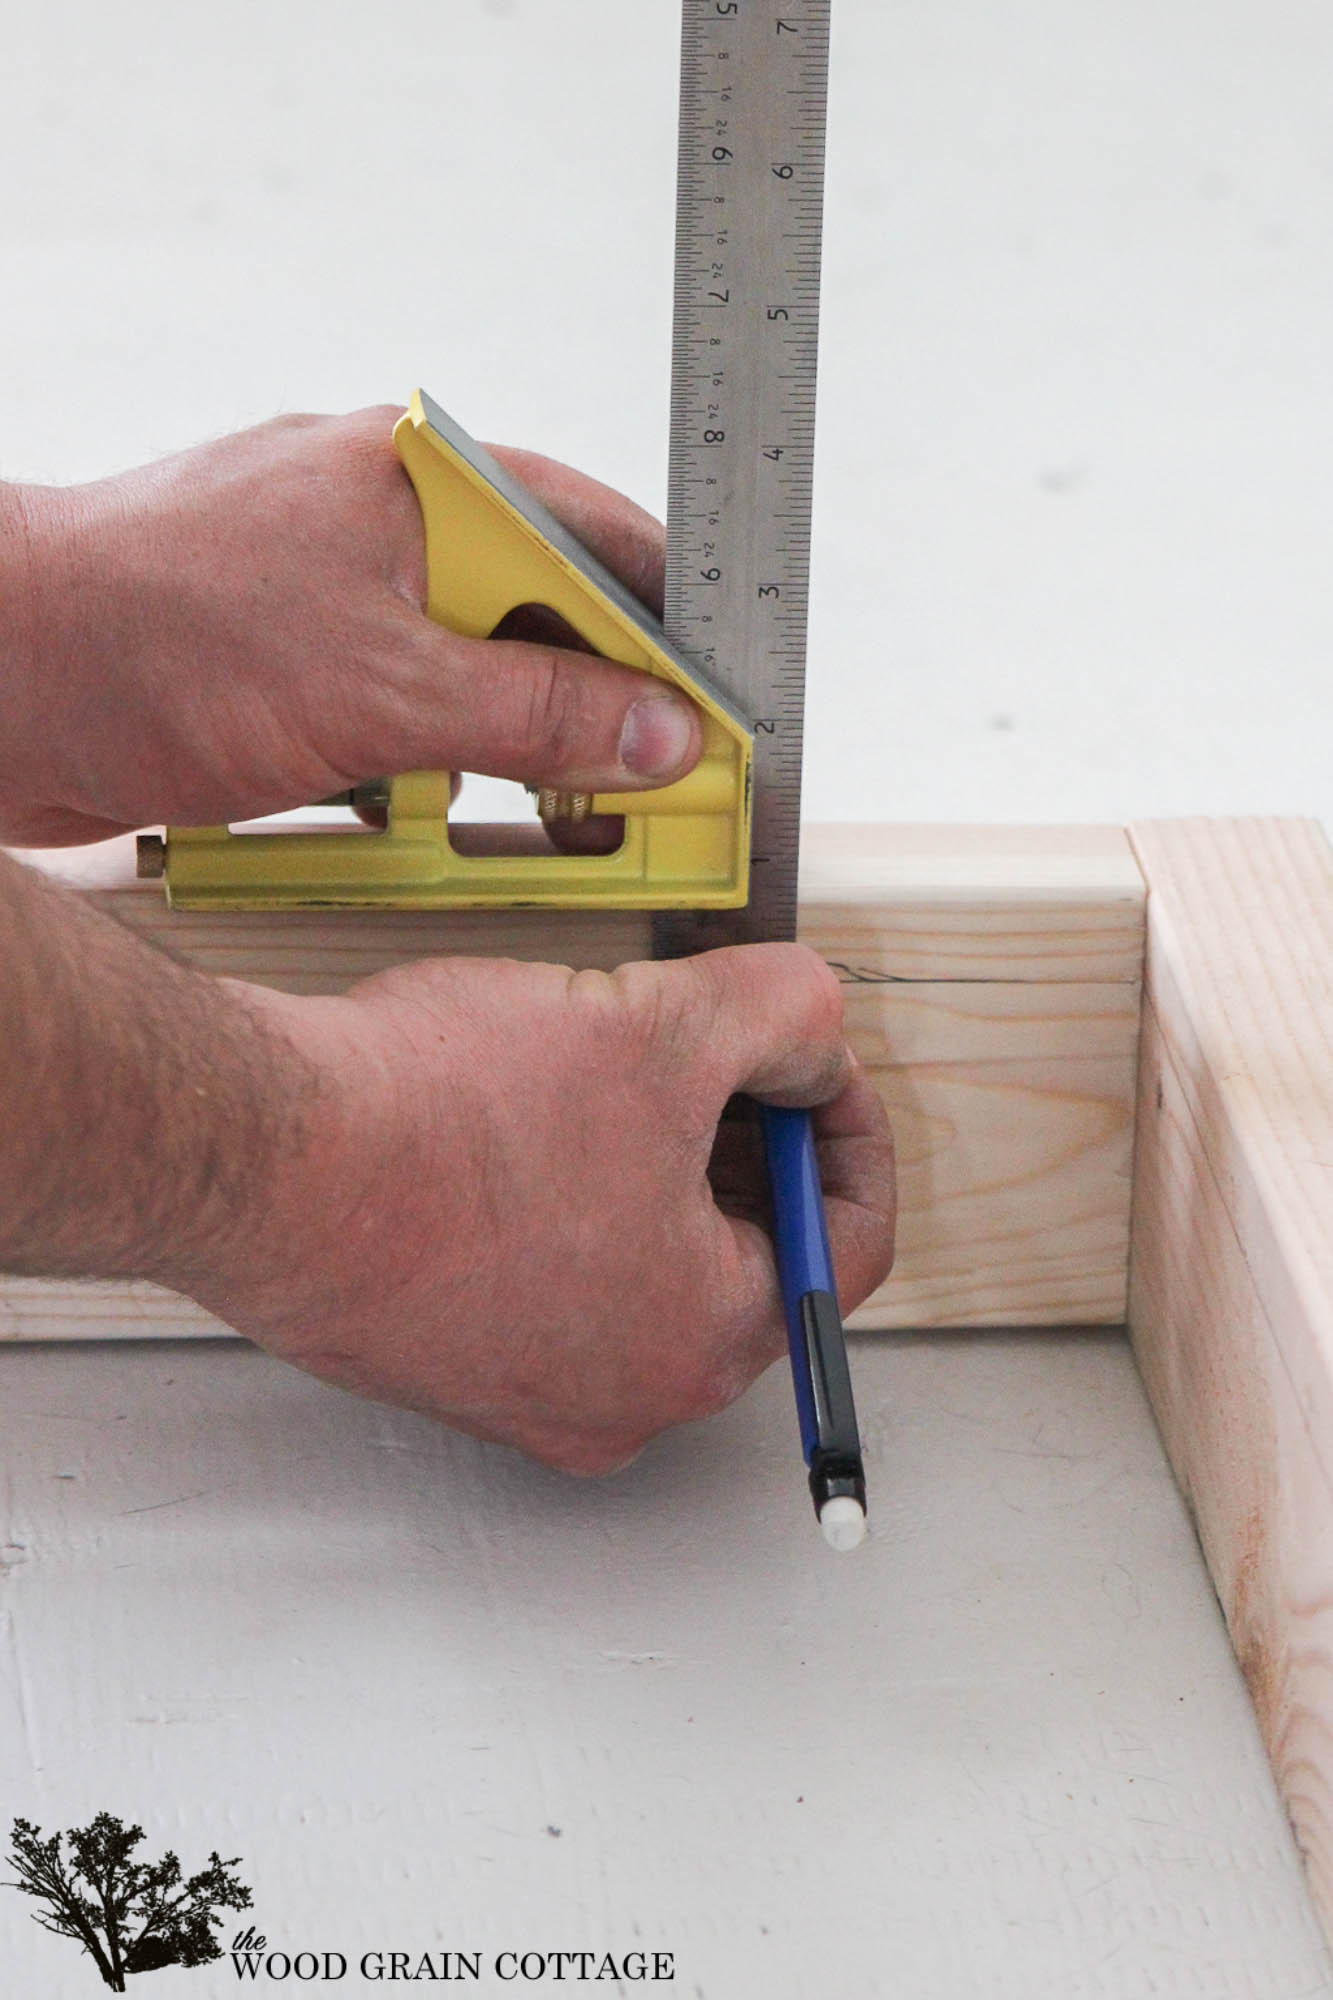
With all the supports in place, we started adding the legs. Since we had trimmed down the middle supports for the table top, Anthony used his square to set the thickness of the top. He then drew a line across each four table leg areas…
There are affiliate links located below in this post… thank you for helping support our blog!
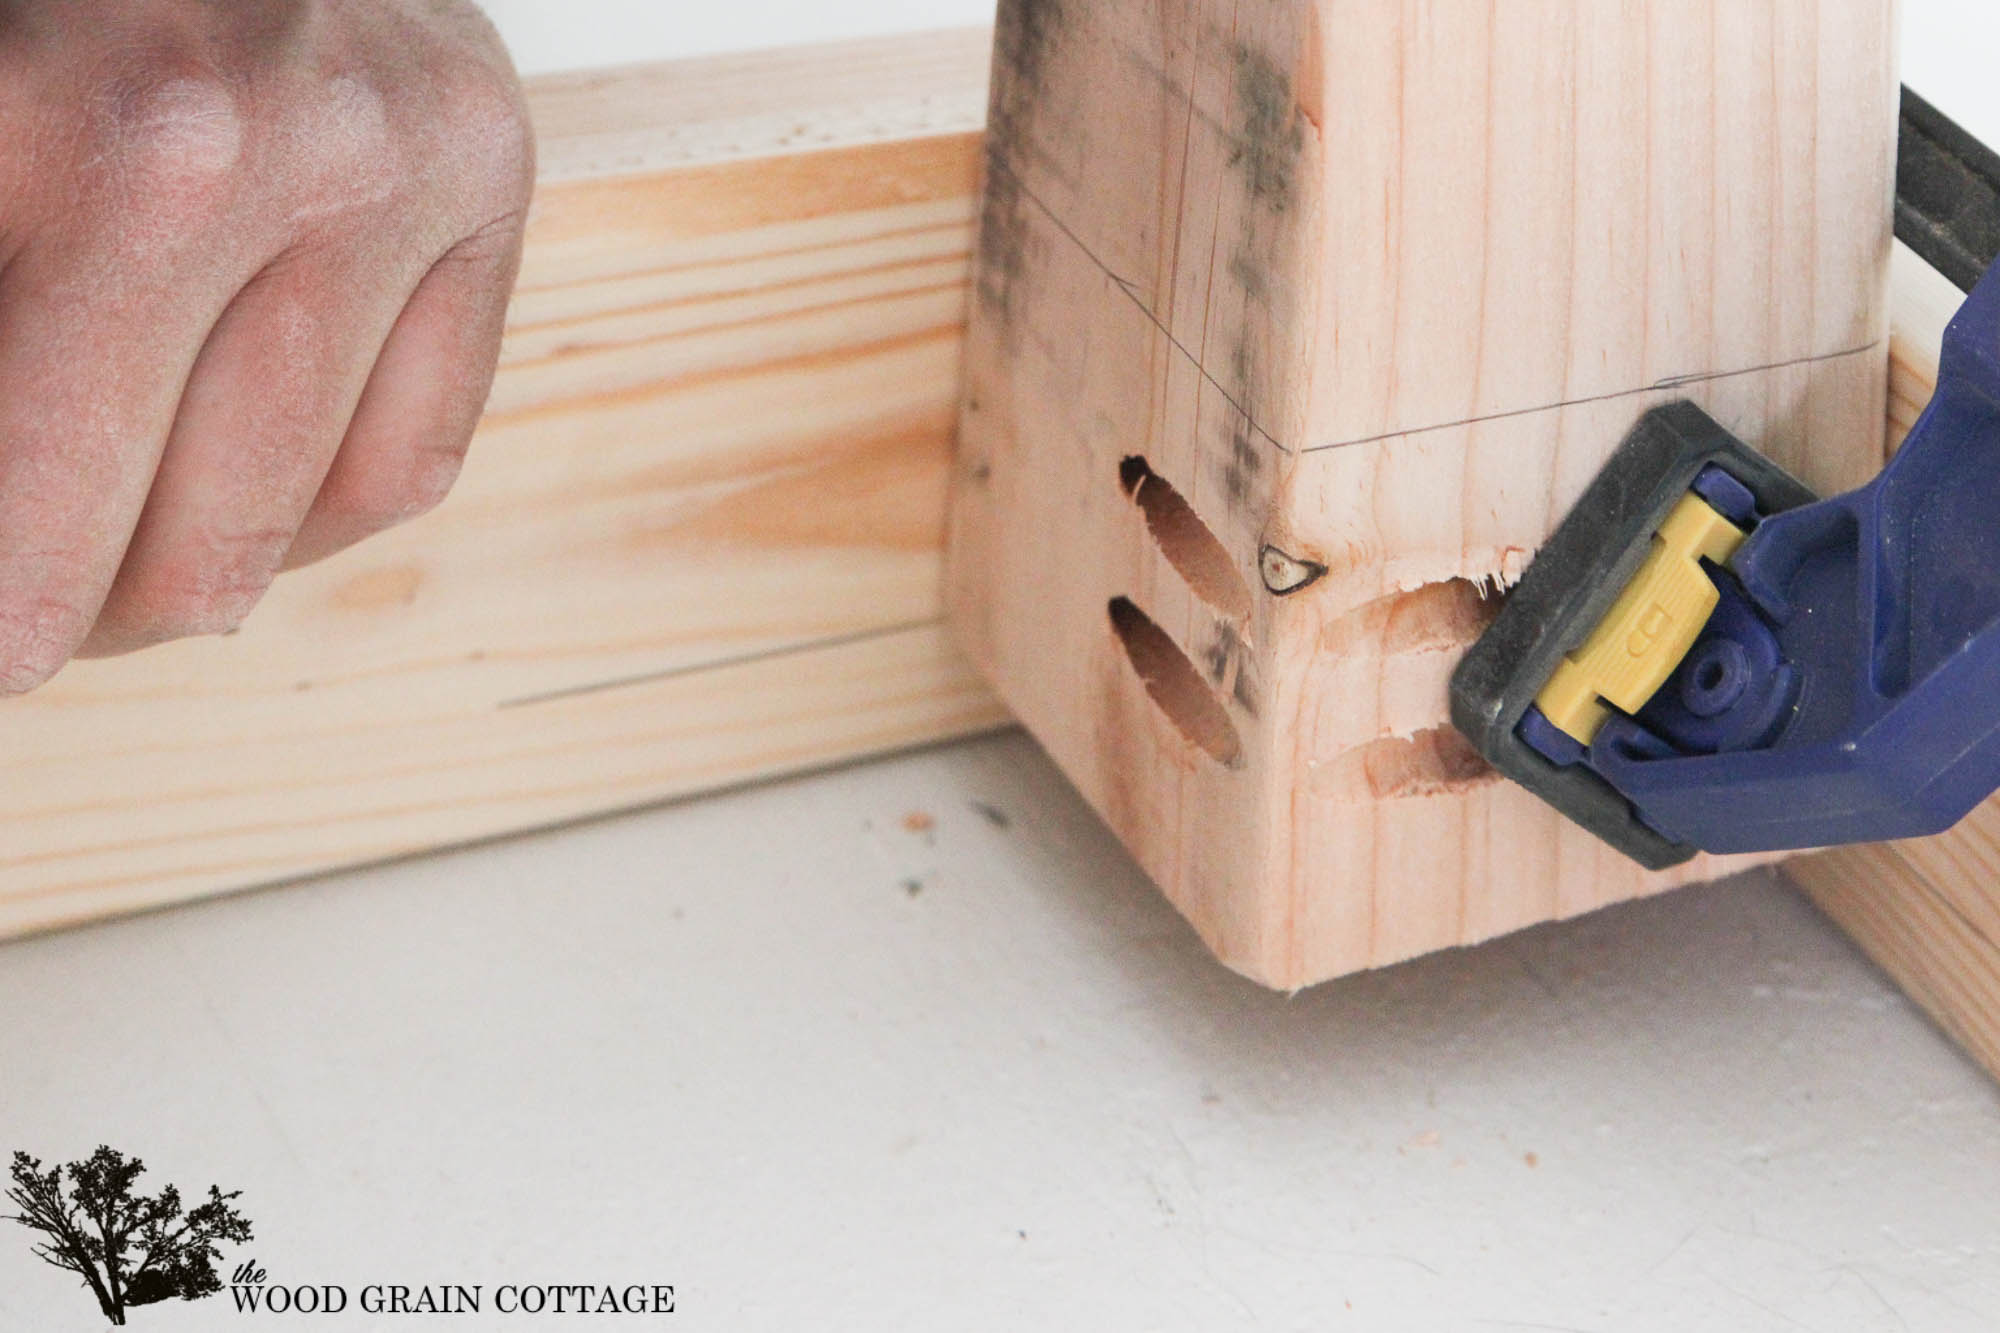
Then on the 4″ x 4″ table legs, we used our Kreg Jig to drill out the pocket holes for our screws. We just measured the space, then attached the Kreg Jig, and used the included tool to drill out the holes…

This is what it left use with…

Next, I held the table leg while Anthony positioned it in place, then we clamped it…

Made sure it was straight…

And lined up with the bottom of the leg up with the line Anthony had marked…
Then we added the screws to hold the leg in place…

Here’s a closer look at it…

With the first leg in place, we continued the same steps with the rest of the legs, then flipped the table over. With the table right side up, we added the last four support pieces to the top of the table…

Those four pieces needed to be installed after the legs had been attached since the legs took up some of the overall space. We again used our Kreg Jig to drill the holes for our screws. So unbelievably handy!
Here’s what it looked like…

And you can see the gap we left for the table top…

For the top, we used premium grade birch plywood. We bought two 4′ x 8′ sheets…

Then we measured and trimmed off the extra foot on the long side of the board…

With it cut to size, we just dropped them in place…

A perfect fit!

Next, we added screws to hold it all together…


With that, we stepped back to take a look at the table. It was pretty sturdy, but it definitely needed a support in the middle of the table. Because I have big plans for storage underneath the table, I opted to use a 2″x4″ (narrow side out) and have it screwed to the table from the bottom. See image below…
To finish the table, I chose Early American by Minwax….

I stained the whole thing, legs and all, but didn’t stain the middle support legs because they will get painted a bit later…
Once the stain was dry, I applied (at different times) 5 total coats of this fast drying polyurethane…

I lightly sanded the top, after each coat, with 220 grit sand paper and it finished to a super smooth finish. The hard protective finish should hold up great to boxes sliding across the top of the counter.
Here’s the final result (while the last coat of poly is drying)…

Having this shipping counter built has made all the difference. We have the organizers that go underneath built too, but I need to finish them. As soon as they’re done, I’ll be sharing the tutorial. Just you wait and see how much storage they provide. It’s a game changer! 🙂

One step closer to being able to shop online at your fun little place. Love what you are doing!!!
Serious work involved there, looks great. Looking forward to seeing the shop!
Looks great, Shayna! I’m so excited to see this shop take off!!
Looking great!! I am wanting a nice long table for outside in our “outside room ” that we are working on….hmmm may just have to show hubby this idea!! Treated lumber, and some beefy legs,,,might just work!
Love the stain color and can’t wait to see more of your online shop! Your house is absolutely beautiful!
Looks great guys! I missed it first time out, but while I was visiting your shower demo, it caught my eye 😉 I love it!